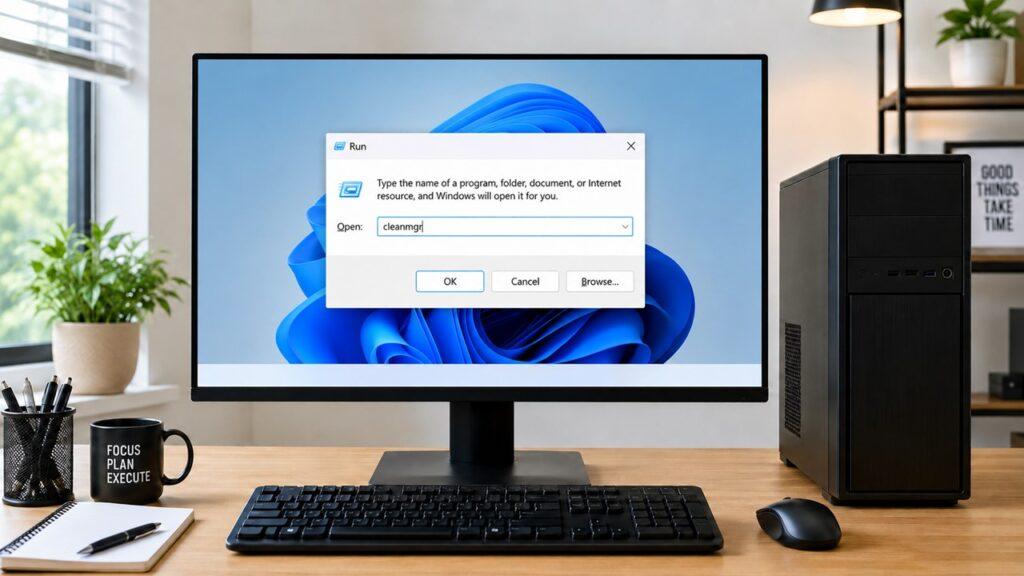
To clean a desktop computer safely, shut it down completely, unplug every cable, move it to a clean non-carpeted workspace, and use the right tools. For the outside, use a microfiber cloth. For the inside, use short bursts of compressed air or an electric air duster while holding the fans still.
In this guide, I’ll walk you through the safe way to clean your desktop computer from the outside, inside, and software side. You’ll also learn what tools to use, what mistakes to avoid, how often to clean your PC, and when it is better to get professional help.
Key Takeaways
- Always shut down and unplug your desktop before cleaning it.
- Move your PC to a hard, flat, well-ventilated workspace.
- Touch bare metal on the case or use an anti-static wrist strap.
- Use microfiber cloths, compressed air, cotton swabs, and isopropyl alcohol.
- Hold fan blades still while blowing dust from fans and heatsinks.
- Never use a household vacuum inside your desktop computer.
- Never spray liquid directly onto your monitor, case, or internal parts.
- Do not open the power supply unit because it can hold dangerous charge.
- Clean the outside monthly and the inside every three to six months.
- Combine physical cleaning with digital cleanup for better performance.
Why Cleaning Your Desktop Computer Matters
Cleaning your desktop computer is not just about making it look nice. Dust can block vents, clog fans, cover heatsinks, and make your PC run hotter than it should.
When your desktop gets too hot, the fans work harder. That means more noise, more heat, and sometimes slower performance. In more serious cases, overheating can cause random shutdowns, crashes, or long-term hardware problems.
A clean desktop computer usually has better airflow. Cool air can enter the case, hot air can escape, and important parts like the CPU, GPU, RAM, motherboard, and storage drives can work more comfortably.
Think of it like this: your desktop case is not just a box. It is an airflow system. When dust blocks that system, your computer has to fight harder to do the same job.
How Often Should You Clean a Desktop Computer?
How often you clean your desktop depends on your room, your PC case, and how heavily you use the computer. A PC sitting on a dusty floor will need cleaning more often than one kept on a clean desk.
| Cleaning Task | Recommended Frequency | Why It Matters |
| Wipe the case exterior | Every 2–4 weeks | Stops dust from building up around vents |
| Clean monitor, keyboard, and mouse | Every 2–4 weeks | Improves hygiene and daily comfort |
| Clean dust filters | Monthly | Keeps airflow from getting blocked |
| Blow dust from fans and heatsinks | Every 3–6 months | Helps reduce heat and fan noise |
| Deep internal cleaning | Every 6–12 months | Removes heavy dust from tight areas |
| Digital cleanup | Monthly | Frees storage and reduces software clutter |
You may need to clean your desktop more often if you have pets, smoke indoors, live near a dusty road, keep the tower on the floor, or use the PC for gaming, editing, rendering, or long daily work sessions.
Tools You Need to Clean a Desktop Computer Safely
Before you open your PC case, gather the right tools. This makes the job easier, safer, and less stressful. Using the wrong cleaner or too much force can cause more problems than the dust itself.
Safe Tools to Use
- Microfiber cloths
- Compressed air can or electric air duster
- 90% or higher isopropyl alcohol
- Cotton swabs
- Soft anti-static brush
- Screwdriver
- Anti-static wrist strap
- Dust mask for heavy dust buildup
- Small bowl or tray for screws
- Distilled water for monitor cleaning
You do not need expensive tools for basic desktop cleaning. Most of the job comes down to patience, gentle handling, and avoiding risky shortcuts.
Tools and Cleaners to Avoid
- Household vacuum inside the PC case
- Window cleaner on the monitor
- Paper towels on screens
- Wet cloths near internal components
- Spray bottles directly on electronics
- Bleach, ammonia, or harsh household cleaners
- Rough brushes
- Hair dryers with heat
- Metal tools near motherboard parts
A normal vacuum may seem useful, but it can create static and damage sensitive components. A hair dryer can also push heat and dust in the wrong way. For internal cleaning, compressed air or an electric air duster is the safer choice.
Safety Steps Before Cleaning Your Desktop PC
Do not rush this part. The safest desktop cleaning starts before you touch the case. A few simple safety steps can protect both you and your computer.
Shut Down and Unplug Everything
First, shut down your desktop computer properly from the operating system. Do not just press and hold the power button unless the PC is frozen.
After the computer turns off, switch off the power supply from the back of the case if your power supply has a switch. Then unplug the power cable from the wall or surge protector.
Next, disconnect your monitor cable, keyboard, mouse, speakers, Ethernet cable, USB drives, and other accessories. Take your time here. You do not want to pull the case and accidentally stress a cable or port.
Move the PC to a Safe Workspace
Place the desktop on a hard, flat surface. A desk, table, or clean wooden floor works well. Try not to clean the computer on carpet because carpet can increase static electricity.
Choose a well-ventilated area. Cleaning a dusty PC can release a surprising amount of dust into the air. If possible, open a window or clean the case somewhere you do not mind making a little mess.
Also, make sure you have enough light. You need to see cables, screws, fan blades, and small areas clearly.
Ground Yourself Before Touching Components
Static electricity can damage computer parts, even when you do not feel a shock. That is why grounding yourself matters before you touch anything inside the case.
The easiest method is to touch an unpainted metal part of the PC case before handling internal parts. You can also wear an anti-static wrist strap if you have one.
Keep these simple rules in mind:
- Avoid working on carpet.
- Avoid wool or static-heavy clothing.
- Touch the metal case often.
- Handle parts by the edges.
- Do not touch motherboard circuits unnecessarily.
- Keep drinks away from the workspace.
You do not need to be scared of opening a desktop case. You just need to be careful and gentle.
Take Photos Before Disconnecting Anything
Before you remove any cable, fan, filter, or part, take a quick photo with your phone. This is especially helpful if you are new to desktop cleaning.
A photo gives you a reference when you put things back together. It can show where fan cables connect, how panels slide into place, and where each cable was plugged in.
This small habit can save a lot of confusion later.
How to Clean the Outside of a Desktop Computer
Start with the outside before opening the case. This removes surface dust and stops loose dirt from falling into the PC while you work.
Clean the PC Case Exterior
The outside of your desktop case collects dust, fingerprints, and grime. The top of the case usually gets dusty first, especially if the tower sits under a desk.
Follow these steps:
- Wipe the top, front, sides, and back with a dry microfiber cloth.
- Use a slightly damp microfiber cloth for fingerprints.
- Use a small amount of isopropyl alcohol on the cloth for stubborn grime.
- Wipe around buttons, USB ports, and audio ports gently.
- Do not spray liquid directly onto the case.
- Let the surface dry before reconnecting anything.
Be careful around front-panel buttons and ports. You want to clean around them, not push moisture into them.
Clean Vents and Fan Grills
Desktop vents and fan grills collect dust quickly because air constantly moves through them. When these areas get blocked, airflow drops and the fans may become louder.
Use compressed air or an electric air duster in short bursts. Blow dust away from the grill instead of deeper into the case whenever possible.
You can also use a dry soft brush to loosen packed dust from the vent holes. Then use air again to remove the loosened dust.
Clean Dust Filters
Many modern desktop cases have removable dust filters on the front, top, side, or bottom. These filters are usually magnetic, clipped, or slide-out panels.
Here is the safe way to clean them:
- Remove the dust filters carefully.
- Tap loose dust into a trash bin.
- Use compressed air to blow off remaining dust.
- Rinse washable filters only if your case manual allows it.
- Let washed filters dry completely.
- Reinstall the filters only when they are fully dry.
Never reinstall a damp dust filter. Moisture and computer components do not belong together.
How to Clean Inside a Desktop Computer Case
Now we get to the most important part: cleaning inside the case. This is where dust causes the most heat and airflow problems. Move slowly and avoid touching parts more than necessary.
Remove the Side Panel
Most desktop cases have a removable side panel. Some use thumbscrews, while others use regular screws. Remove the screws and place them in a small tray so they do not get lost.
If your case has a tempered glass side panel, handle it with both hands. Place it on a soft surface, not on tile, concrete, or the edge of a desk.
After the side panel is removed, pause for a moment and look inside. Notice where the fans, graphics card, CPU cooler, RAM, storage drives, and power supply are located.
Blow Out Loose Dust First
Before wiping anything, remove loose dust with air. This keeps you from smearing dust across parts.
Use this method:
- Keep the compressed air can upright.
- Use short bursts instead of long continuous sprays.
- Start from the top of the case and work downward.
- Blow dust toward open areas of the case.
- Keep the nozzle a safe distance from the motherboard.
- Avoid touching parts with the air nozzle.
- Give the dust a moment to settle before continuing.
If you are using an electric air duster, start with a lower setting if available. Strong airflow can be useful, but you do not want to blast tiny connectors or bend fan blades.
Clean Case Fans Safely
Fans are one of the biggest dust collectors inside a desktop PC. They also need special care.
When you blow air at a fan, hold the blades still with your finger or a cotton swab. Do not let the fan spin freely like a turbine. Overspinning can stress the fan bearing and may send unwanted current back through the fan motor.
Clean the fans like this:
- Hold the fan blades still.
- Blow dust from the front and back of the fan.
- Wipe the fan frame with a dry microfiber cloth.
- Use a cotton swab for the corners.
- Do not bend the blades.
- Do not push the fan too hard.
A fan does not need to look brand new. The goal is to remove the dust that blocks airflow or adds weight to the blades.
Clean the CPU Cooler and Heatsink
The CPU cooler is usually near the center or upper part of the motherboard. It may be an air cooler with a heatsink and fan, or part of a liquid cooling setup.
For a normal air cooler, dust often gets trapped between the metal fins. Use short bursts of air through the heatsink from different angles. Hold the fan still while you do this.
Do not remove the CPU cooler for routine cleaning. If you remove it, you usually need to clean off the old thermal paste and apply new thermal paste correctly. That is a more advanced task and not necessary for basic dust removal.
Clean the Graphics Card
If your desktop has a dedicated graphics card, it can collect a lot of dust. Gaming PCs especially tend to build dust around GPU fans and heatsink fins.
Clean it carefully:
- Hold GPU fans still before blowing air.
- Blow dust through the heatsink fins.
- Clean the backplate with a dry microfiber cloth.
- Use a soft brush for loose dust near edges.
- Avoid pressing on the card.
- Do not remove the GPU unless you are comfortable reinstalling it.
If your graphics card has thick dust inside the heatsink, use air from multiple angles. Do not use liquid cleaners on the GPU.
Clean the Motherboard, RAM, and Expansion Slots
The motherboard does not need aggressive cleaning. In fact, you should avoid touching it as much as possible.
Use gentle air bursts to remove loose dust from the motherboard surface, RAM sticks, and expansion slots. A soft anti-static brush can help with dusty corners, but do not scrub.
If you see sticky residue, use a cotton swab lightly dampened with isopropyl alcohol. The swab should be damp, not dripping. Let the area dry fully before turning the computer back on.
Clean the Power Supply Area Safely
The power supply unit, or PSU, is usually at the bottom or back of the case. It has its own fan and vent area, and dust can build up around it.
You can clean the outside grill and surrounding dust. Use compressed air through the exterior vent while keeping the air bursts short.
Do not open the power supply unit. A PSU can hold dangerous electrical charge even after the computer is unplugged. Internal PSU cleaning should be done only by someone qualified.
What Not to Do When Cleaning a Desktop Computer
Some cleaning mistakes can damage your computer quickly. This section is important because safe cleaning is not only about what you do. It is also about what you avoid.
- Do not clean the inside while the PC is plugged in.
- Do not spray liquid directly onto computer parts.
- Do not use a household vacuum inside the case.
- Do not let fans spin freely from compressed air.
- Do not use window cleaner on your monitor.
- Do not use paper towels on screens.
- Do not reinstall wet dust filters.
- Do not open the power supply unit.
- Do not remove the CPU cooler unless you can reapply thermal paste.
- Do not scrub the motherboard.
- Do not pull cables by force.
- Do not use a hair dryer with heat.
- Do not rush the reassembly process.
- Do not ignore unusual smells, corrosion, or liquid damage.
When in doubt, stop and check before continuing. A slow cleaning job is much safer than a rushed one.
How to Clean Your Monitor, Keyboard, and Mouse
Your desktop computer setup is more than the tower. The monitor, keyboard, and mouse also collect dust, oil, fingerprints, and crumbs. Cleaning them makes your setup feel much better to use.
Clean the Monitor
A monitor screen is easy to damage with the wrong cleaner. Avoid glass cleaner, alcohol-heavy sprays, ammonia, and rough paper towels.
Use these steps:
- Turn off the monitor.
- Unplug it if you want extra safety.
- Wipe the screen with a dry microfiber cloth.
- For smudges, lightly dampen the cloth with distilled water.
- Wipe gently from one side to the other.
- Do not spray water directly on the screen.
- Dry the screen with another clean microfiber cloth.
Use light pressure. Pressing too hard can damage the panel.
Clean the Keyboard
Keyboards can be surprisingly dirty because they catch dust, hair, crumbs, and skin oils.
Clean your keyboard like this:
- Unplug the keyboard.
- Turn it upside down.
- Gently shake or tap it to remove loose debris.
- Use compressed air between the keys.
- Wipe keycaps with a slightly damp microfiber cloth.
- Use cotton swabs around key edges.
- Let it dry before plugging it back in.
For mechanical keyboards, you may remove keycaps if you know how to do it safely. Use a keycap puller, not a knife or screwdriver.
Clean the Mouse
Your mouse collects oil from your hand and dust from the desk surface. A dirty sensor area can also affect tracking.
Follow these steps:
- Unplug the mouse or remove the batteries.
- Wipe the outer shell with a microfiber cloth.
- Clean around buttons and the scroll wheel.
- Use a dry cotton swab near the sensor.
- Remove dust from the glide feet gently.
- Let everything dry before reconnecting.
Do not push liquid into gaps around the buttons or scroll wheel.
How to Put Your PC Back Together After Cleaning
Reassembly is just as important as cleaning. A loose cable, missing filter, or forgotten screw can cause problems when you turn the computer back on.
Before closing the case, use this checklist:
- Reinstall all dust filters.
- Check that fan cables are connected.
- Make sure no cotton swab or cloth is inside.
- Check for loose screws.
- Make sure cables are not touching fan blades.
- Reattach the side panel securely.
- Plug monitor, keyboard, mouse, and power cables back in.
- Turn the power supply switch back on.
- Start the PC and listen carefully.
When the PC starts, check that the case fans, CPU fan, and GPU fans behave normally. Some GPU fans do not spin at idle, so do not panic if your graphics card fans stay off while the computer is cool.
What to Check After Cleaning Your Desktop Computer
After cleaning, spend a few minutes checking whether everything works properly. This helps you catch small issues before they become bigger problems.
Check Fan Noise
Your PC may sound quieter after cleaning because the fans no longer need to fight through dust. However, if you hear rattling, clicking, or scraping, shut the computer down and inspect the inside.
A cable may be touching a fan blade. A fan screw may be loose. A dust clump may also be stuck near the fan frame.
Check CPU and GPU Temperatures
Cleaning often improves temperatures, especially if the CPU cooler, GPU, and filters were dusty.
You can use hardware monitoring software to check CPU and GPU temperatures. Exact safe temperatures vary by model, so do not rely on one universal number. Instead, compare temperatures before and after cleaning if you can.
Lower temperatures, quieter fans, and fewer sudden slowdowns are good signs.
Check Airflow Direction
Desktop cases usually work best when cool air enters from the front or bottom and hot air exits from the rear or top.
After cleaning, make sure fans are not blocked by cables, dust filters, or nearby walls. Leave enough space behind the case so hot air can escape.
If the case sits under a desk, make sure it is not trapped in a tight corner with poor airflow.
Digital Cleanup After Physical Cleaning
Physical cleaning helps airflow and temperatures. Digital cleanup helps storage, startup speed, and general responsiveness. For the best result, do both.
Delete Temporary Files
Windows creates temporary files during updates, installations, browsing, and normal app use. Over time, these files can take up storage.
On Windows, you can use Storage settings or Disk Cleanup.
Basic steps:
- Open Settings.
- Go to System.
- Select Storage.
- Open Temporary Files.
- Review what Windows suggests.
- Remove safe junk files.
- Empty the Recycle Bin if needed.
Do not delete files you do not understand from random system folders. Use Windows built-in cleanup tools when possible.
Uninstall Programs You Do Not Use
Unused programs can take storage, add startup entries, and run background services. Go through your installed apps and remove software you no longer need.
Be careful with drivers, security tools, and system utilities. If you do not recognize a program, search its name before uninstalling it.
Clear Browser Cache and Unused Extensions
Browsers can collect a lot of cache, cookies, history, and extensions. This can make the browser feel heavy.
Do this occasionally:
- Clear browser cache.
- Remove unused extensions.
- Delete unnecessary cookies.
- Update your browser.
- Restart the browser after cleanup.
You do not have to clear everything every day. A monthly cleanup is enough for most users.
Run a Malware Scan
If your desktop still feels slow after physical and digital cleaning, run a malware scan. Malware, adware, and unwanted programs can use CPU, RAM, disk, and network resources in the background.
Use a trusted security tool and run a full system scan. Keep Windows and your antivirus software updated so they can detect newer threats.
Common Problems After Cleaning a PC and How to Fix Them
Most cleaning jobs go smoothly, but small issues can happen. Do not panic. Many problems come from loose cables, switches, or panels.
| Problem After Cleaning | Likely Cause | What to Do |
| PC will not turn on | Power cable loose or PSU switch off | Check wall power, PSU switch, and power cable |
| No display | Monitor cable or GPU power cable loose | Reconnect display cable and GPU power cable |
| Fans are loud | Cable touching fan or dust still trapped | Shut down and inspect fan area |
| Rattling sound | Loose screw, cable, or fan mount | Open case and check carefully |
| Keyboard or mouse not working | USB cable loose or device still damp | Reconnect and let it dry fully |
| High temperatures remain | Dust still in heatsink or poor airflow | Recheck filters, fans, CPU cooler, and GPU |
| PC turns on then shuts off | Loose internal cable or overheating issue | Check connections and fan operation |
| Strange smell | Possible electrical or dust-related issue | Turn off PC and inspect before using again |
If the problem started right after cleaning, think about what you touched or disconnected. Your phone photos can help you compare the before and after setup.
When Should You Get Professional Help?
Basic desktop cleaning is safe for most people. However, some situations are better handled by a repair technician.
Get professional help if:
- Your PC is still under warranty and opening it may affect coverage.
- You are uncomfortable opening the case.
- There is liquid damage inside.
- You see corrosion or rust.
- The PC smells burnt.
- The power supply needs internal cleaning.
- The CPU cooler must be removed.
- You need thermal paste replacement but have never done it.
- The desktop will not boot after cleaning.
- You hear grinding, sparking, or electrical buzzing.
- Dust buildup is severe and packed into tight areas.
There is no shame in asking for help. It is better to pay for safe service than damage an expensive motherboard, graphics card, or power supply.
Simple Tips to Keep Your Desktop Cleaner for Longer
The cleaner your environment is, the less often you need deep cleaning. Small habits can reduce dust buildup inside your desktop case.
- Keep the tower off carpeted floors.
- Place the PC on a desk or stand if possible.
- Leave space around vents and exhaust fans.
- Clean your desk area regularly.
- Use dust filters on intake fans.
- Avoid smoking near the computer.
- Keep pets away from the PC tower.
- Do not eat over the keyboard.
- Check filters every month.
- Keep cables tidy inside the case.
- Avoid blocking the rear of the case against a wall.
- Use an air purifier in very dusty rooms.
A little prevention makes every future cleaning easier.
Conclusion
Cleaning a desktop computer safely is mostly about preparation, patience, and using the right tools. Shut the PC down, unplug everything, ground yourself, and work on a clean non-carpeted surface. Then clean the outside, filters, fans, heatsinks, graphics card, and peripherals without spraying liquid or forcing anything.
A clean desktop usually runs cooler, quieter, and more reliably. You do not need to deep clean it every week, but a steady routine every few months can protect your parts and keep your setup feeling fresh.
Related FAQs
How Often Should I Clean My Desktop Computer?
Clean the outside every few weeks and clean the inside every three to six months. Clean it more often if you have pets, smoke indoors, use a carpeted room, or see dust building up around vents.
Can I Use a Vacuum Cleaner to Clean My Desktop PC?
You should not use a household vacuum inside your desktop case. Vacuums can create static electricity and may damage sensitive components. Use compressed air or an electric air duster instead.
Is It Safe to Clean a PC With Compressed Air?
Yes, compressed air is safe when used correctly. Use short bursts, keep the can upright, and hold the fans still while cleaning them.
Can I Use Alcohol to Clean Computer Parts?
You can use 90% or higher isopropyl alcohol on a microfiber cloth or cotton swab for stubborn residue. Do not pour or spray alcohol directly onto components.
Should I Remove the CPU Cooler While Cleaning?
You do not need to remove the CPU cooler for normal dust cleaning. Only remove it if you know how to clean and reapply thermal paste properly.
Can Dust Make a Desktop Computer Overheat?
Yes, dust can block vents, fans, filters, and heatsinks. This reduces airflow and traps heat inside the case, which can make the PC run hotter and louder.
Is an Electric Air Duster Better Than Compressed Air?
An electric air duster can be better for regular cleaning because it is reusable and does not run out like canned air. However, it still needs to be used carefully around fans, cables, and small connectors.
Can I Clean My PC Without Opening It?
You can clean the exterior, vents, ports, and dust filters without opening the case. However, dust on internal fans, heatsinks, and the graphics card usually requires removing the side panel.
Can I Use Water to Clean My Desktop Computer?
You can use a slightly damp microfiber cloth on the outside of the case or monitor, but never use water inside the computer. For internal residue, use a tiny amount of isopropyl alcohol on a cotton swab.
Why Is My PC Still Hot After Cleaning?
Your PC may still run hot if dust remains inside the heatsink, fans are blocked, airflow direction is poor, thermal paste is old, or the case does not have enough ventilation.

Justin has spent years learning how blogs, websites, hosting, and online income work in the real world. Along with blogging and SEO, he also covers desktops, laptops, PC parts, and everyday tech, sharing easy-to-understand advice for readers who want to build better websites and choose better tools.